Tag: accessory

Review: Kick Ash Basket for the Big Green Egg

I’ve been cooking on my Big Green Egg for about ten years now.  During that time, I’ve gotten pretty good at managing my fire and creating pretty darned good BBQ using the Egg in it’s default configuration.

Over the past few months, I’ve begun to add a few upgrades.  I replaced my cast iron daisy wheel with the Smokeware Vented Chimney Cap a few months ago.  And most recently, I acquired the Kick Ash Basket for my firebox. 

I ran into an issue recently where I did back to back cooks and needed to reload the BGE with fresh lump charcoal while it was still hot.  Of course trying to knock the ash out of a hot cooker is tough to do.  About that sime time, I came across the Kick Ash Basket and decided to give it a shot.

You can use this with or without the cast iron fire grate in the bottom of the firebox.  So far, I’m still using the grate.  But the beautiful thing here is being able to pick up the basket and give it a good shake to clear the ash out of the bottom of of the Egg.  It sure beats stirring the old lump to knock the ash loose.

Since I’ve been using the Kick Ash Basket, I’ve noticed that my fire comes up to temp quicker as I’ve been able to remove the ash from the old lump chacrcoal more completely.

I’m really pleased with this aftermarket product and definitely consider it an upgrade.  What upgrades have you made to your BGE?  Drop me a note and let me know.

Cheers,

Braddog

Review: Qwik Trim Brisket Trimmer

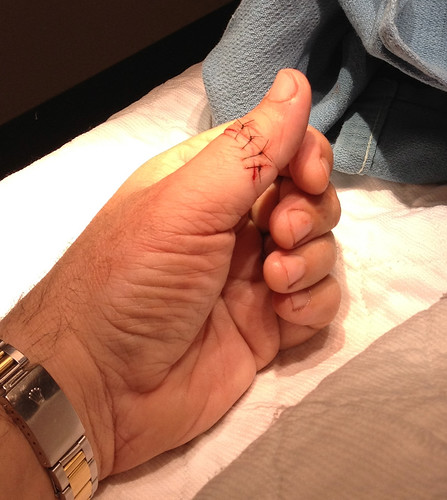
I’m a big fan of trimming my brisket before cooking. This gives me a huge surface to apply seasoning and frankly I don’t like dealing with the fat on my brisket while eating it. I’ve been trimming my brisket now for a few years despite incurring a significant injury while doing so. See my previous post “How Not to Trim a Brisket“.

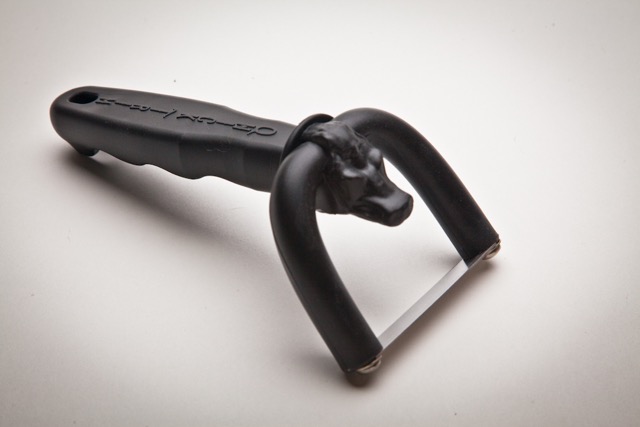
Rather than risk another injury like this, I jumped at a chance to acquire the new Qwik Trim Brisket Trimmer that promises to simplify the trimming process. I ordered it right away and received it just a few days before I needed to trim a couple of brisket flats for a party.

It’s really a pretty simple concept and protects the pitmater from the inadvertent slip of the trimming knife. I rinsed the brisket flats and was eager to get started.

You can see the concept in action in this photo.  It turns out that it works great for the large, cold, hard fat on the underside of a brisket.  However, it doesn’t work as well on the softer, thinner layers of fat.  I trim both from my brisket, so I still had to use my trimming knife to get the end result that I prefer.

If you’re a pitmaster that likes to leave that thinner layer of fat on your brisket, then the Qwik Trim could be a good option for you.  But, if you’re a fan of trimming all of the fat you’ll still have some work to do with a trimming knife.

Cheers,
Braddog 

Review: Smokeware Vented Chimney Cap for the Big Green Egg

I’ve been cooking on a Big Green Egg for several years now.  My stand operating procedure (SOP) has always been to place the cast iron vented cap inside the hot grill when I finish and use the solid ceramic cap to extinguish my fire (along with closing the lower vent compeltely).  This allows for the cast iron cap to burn off any build up, while extinguishing the fire more efficiently with the solid ceramic cap.

Alas, I finally did what may others before me have done.  When removing my all weather cover from the egg and table, I inadvertently flipped the solid cerami cap off and busted it on the pavers in my cooking area.

Sure, I could just use the cast iron vented cap to shut the cooker down.  But I know from previous experience that it gets gummed up pretty quickly and becomes hard to use.  I could also break out the JBWeld and try to repair the ceramic.  But I know from previous experience that it would only be a temporary solution.

So I decided to just buy a new cermaic cap.  Much to my surprise, I had a hard time finding one.  Then, I stumbled onto this new SmokeWare SS Vented Chimney Cap from Smokeware.  It looked very interesting and it’s affordable enough that I thought, “Why not?”.

The product shipped quickly and I finally got around to installing it.  First, I had to clean the chimney where the new cap will sit.  I scrubbed it pretty good, but there’s some discoloration from years of use that was more stubborn than me.

Then, to ensure that the new cap is airtight a felt gasket is applied.  This is similar to the gasket between the base and lid of the Big Green Egg.

Then the lower part of the 2-piece stainless steel vent cap sits firmly against the egg.

And finally, the adjustable cap fits on top of that.

Here are my initial thoughts on the SmokeWare SS Vented Chimney Cap .

Pros:

  • It’s affordable, yet well-made
  • It solves both the need to control air flow and the need to cover the chimney for extinguishing the fire and storing the egg
  • It’s build like the flue on your chimney such that it won’t allow rain/water into the system.  I’ve cooked under an umbrella and other unique arrangements to avoid this.
  • It sealed tight enough that I don’t think it’ll come off easily

 Cons: 

  • It’s stainless steel and it does get hot.  I wish the tab to control the size of the opening was a little longer/bigger.  If you’re not careful you’ll burn your hand, trust me I know.
  • I wish the sliding vent control had a stops for fully open and fully closed.  As it is, the vent control can move 360 degrees.  You have to be sure to position it exactly right to fully close off the air flow.

All in all, I think it’s a winner.  Check out the folks over at Smokeware.net for this and other BBQ accessories.

Cheers,
Braddog 

Review: Ro-Man Pork Puller

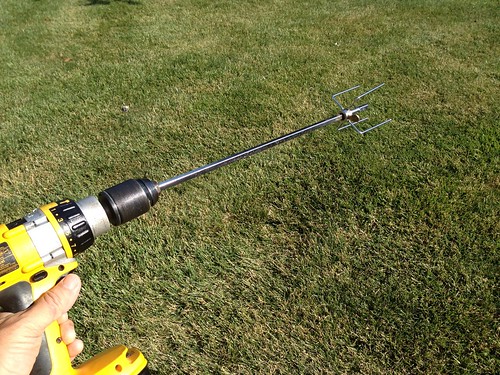
while ago, I wrote about a prototype pork puller that I created based on a product that I’d seen on the web.  My DIY pork puller worked okay, but the materials weren’t all that substation.  I used a rotissiere rod and clamp from a Weber gas grill inserted into a cordless drill.  While that worked fine for light use at home, it just didn’t hold up over time.

This is my DIY version

I considered building another one on my own but considering the investment had already made and the cost to do it again, I decided that I’d just spring for the product that my design was based on, the Ro-Man Pork Puller.

To clarify, Santa Claus brought me the Pork Puller and I’ve used it all spring.  Now that I’ve had a chance to evaluate it extensively, I thought I’d document my observations.

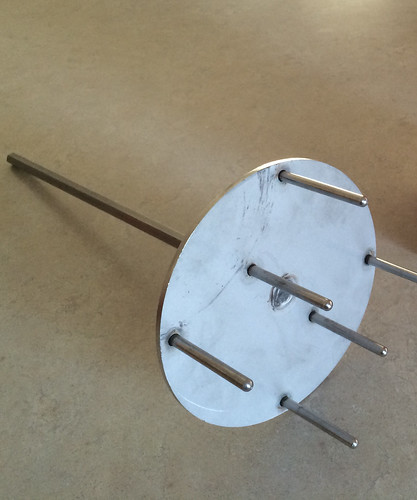
The significantly more substantial Ro-Man Pork Puller

In short, this thing is WAY better than my DIY model.  The stainless stell tines and the disk that they are welded too are significantly sturdier than my rotissiere based model.  The shaft that is inserted into a cordless drill is also substantial, and it’s long enough to easily reach to the bottom of a large stock pot.

Is it worth $68.95?  Well, I’ll answer that a couple of ways.  If you cook a lot of pulled pork and have to pull more than 2 at a time, then absolutley.  Secondly, you’re talking to a guy that spent $90 on a quick read thermometer.  I’ve spent this much money on lesser products, that’s for sure.  For me, it as well worth the investment and believe that I’ve gotten my money’s worth just using it for the graduation parties that I cooked for this spring.

Check out the videos and links over at http://www.porkpuller.com and pick one up for yourself.  

Cheers,
Braddog